I think it looks a lot better on this picture that it did in person. The lamp has a brassy base that has become discolored. Again, making it look outdated.
There are faded and worn spots on top of this table.
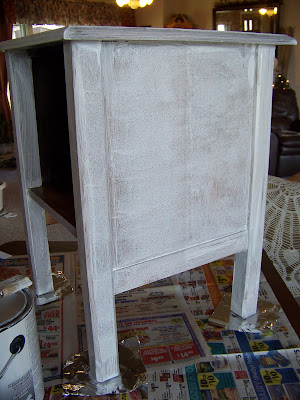
I started off by priming everything in order to make sure the paint and glaze would stick without scraping right back off. I suggest a Zinsser or Kilz type of primer that is made for nonporous surfaces.
After the primer dried well, I coated both pieces (and the lamp base) with a base color. In this case, I chose a pecan colored latex satin paint because I wanted it to have reddish brown cast.
These doors are from another project, but they show what the base color looked like. Once the base coat dried, it was time to mix up the glaze. I used a DutchBoy glaze that had instructions for mixing 4 parts glaze with 1 part latex paint. I used a dark coffee colored satin latex paint for the glaze color.
Once the glaze was mixed, I painted it on but made sure I worked only in small areas at a time so that it wouldn't begin to dry before I could wipe some off. Yes, I did mean to say wipe some off. Using a damp rag (a cotton cloth diaper type rag), I wiped off some of the glaze after I painted it on.
If you wipe off too much, you can always add some back on with the brush.
The wiping must be very light and gentle for this to work. Otherwise, you'll wipe too much off. Also, whenever possible, it's best to wipe with the grain since it will help add some new grain.
The lighter areas on the finished door are the areas where I wiped off more with the damp rag.
Once the paint dried well, I coated the whole thing in a polyurethane to protect it and to bring out the shine. If you want to get rid of all brush stroke grooves, it's best to let everything dry well, then sand with a very find grain auto grit sand paper and do the poly coat. Then sand lightly again and coat with a Minwax paste finishing wax. This will give it the smoothest possible waterproof finish. While all of this isn't necessary, it does give your pieces a professional looking surface.
I love the transformation!
I'm linking this post to these fabulous blogs this week:
I'm linking this post to these fabulous blogs this week:
- Trash to Treasure Tuesday at Reinvented
- Motivate Me Monday at Keeping it Simple
- Anti-Procrastination Monday at New Nostalgia
- Transformation Tuesday at The Pumpkin Patch
- Letting the Creative Juices Flow Link Party at These Creative Juices
- Get Your Craft on Tuesday at Today's Creative Blog
- DIY Day at A Soft Place to Land
- Before and After Party at Thirfty Decor Chick


So pretty! I can't believe how much better it looks. Thanks for linking up to Transform Tuesday! I can't wait to see what you have to link up next week. :)
ReplyDeleteWOW, that looks great!
ReplyDelete