Content from this blog now appears on www.michellerayburn.com

t

Memorial Weekend Friday Blog Hop

Did you miss WWYD Wednesday this week? It will be back next week. I got a little busy with landscaping, gardening, and catching up on things after our deck makeover.

What are you doing for Memorial Weekend? Have you created a project or a special blog post in memory of someone special? We'd love to have you share your links on the Follow Friday Blog Hop below.

Also, check out my free download of the song I wrote called "Pray for the Soldiers" . For the free download, just right click on the link on the music page on my website and then save the MP3 file. I'm so thankful for those who have given up so much to protect our country! I was finishing up some planting the other night and ran inside to get the flag to add to the front yard. I have a dawn to dusk spotlight on it, so even when I'm sitting inside at night, I can see my flag as reminder of the great country we live in. 

Follow Friday Blog Hop

Blog Hop Instructions:
  • Be sure to link to a specific blog post not your home page so that we can find your fab projects and posts easier. 
  • Please include a link to the site and mention on your blog post that you're linking up to T2T OR Mention on your twitter account that you're linking up to Trash to Treasure for the blog hop and include a hyperlink to this post. If you tweet a link please mention my twitter name: @trashtotreas in your tweet.
  • You can even get the code and paste the blog hop on your own blog if you'd like these very same ideas posted for your readers.
With the new Linky Tool (formerly called MckLinky) you'll be able to add a thumbnail of your project if you have a picture on your post, or upload a pic from your computer.

Recycled Deck

I've recently extended my trash to treasure projects beyond just decorating. In some ways it's decorating because it has everything to do with the curb appeal of my home. And it has everything to do with how I feel about my house.

When we purchased our house, it had this 12 by 16 foot deck on the front. It had nothing special about it. The railings were plain and it functioned mostly as a means of getting us into the front door.
As you can see, our home is a little unusual. It was once a church with an attached parsonage. But I think the deck on the front really kept the ranch part looking like it belonged in a past decade.

We seldom sat on the deck because it offered no privacy from the cars going by or the gas station just kitty-corner to us. So all winter I shoveled snow off it and put chairs out for looks in the summer. But since it's on the south side, the sun baked us and the yellow jackets wouldn't leave us alone on the few occasions we tried sitting out there.

This spring, when I was longing for something in the back yard where we had just a plain cement steps, I came up with the brainy idea of recycling our deck by taking it down and using the lumber to build a deck on the back side.
Kinda plain. And no place to sit and enjoy the shade.

So, I talked my handy hubby into tearing off the front deck to recycle it for the back. 
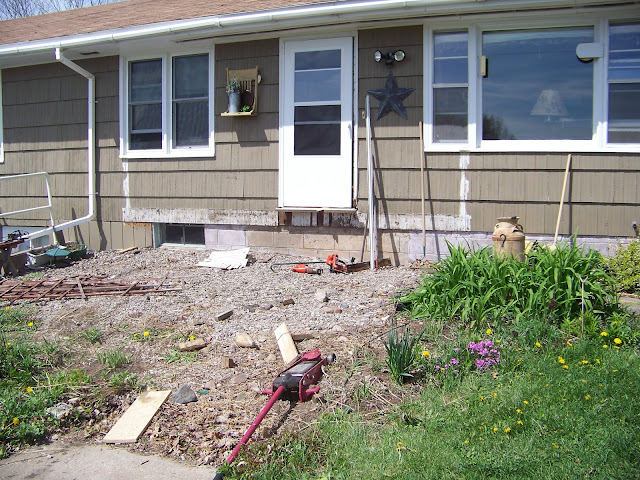
Lovely, huh? This is what happens when a wife gets a bright idea. The next challenge was to figure out how to build a smaller replacement "deck" and connect it to the sidewalk while also managing the slope. 

I designed the brick part and my hubby helped get it all installed. The above photo was when it was 90% finished. All it needed was the hand rails.
 
All done! We bought new treated lumber for this project. (BTW, I took the picture at dusk and the weird glow by the door is the security light). Now, for the recycled deck in the back.

First, my hubby started framing it in.
We decided to leave the existing steps in place and build the new deck alongside with a small step up. Eventually, the old cement steps will get a stone facade treatment mortared on.

Before the last board was on, I started putting furniture on the deck. I couldn't wait! When the last board was on, my hubby sat down to admire his work. Or take a nap.


 He flipped all the boards to the side that wasn't stained. I'll eventually stain the deck with some sort of water sealer. And we'll be rerouting that down spout so it goes under the deck as soon as we get supplies.


 I'm so thrilled with both the front and the back now! And by recycling the one deck, the whole project cost less than half of what it would have. Now, I'm hoping to find some "new" patio furniture at a thrift sale. And you can see some of the stones on the right bottom corner that will eventually be fitted and mortared onto the cement steps. But, I'll let my hubby rest a little before starting that project!

I'm linking up this week to:

Office Chair Mat Project- Designed by My Son

My Trash 2 Treasure Teen
Every so often, there comes a moment in a trash to treasure decorator's life when someone in her household grasps the wonder of the thrill of a great T2T project. That moment when she isn't the only one who stands back and admires a project, but when she is instead the one admiring the work of one of her offspring. And the feeling of pride when that offspring is her 15-year-old son who has come up with his own trash to treasure project is nearly impossible to put into words. 

Recently, my son cleaned his room. I know, wonders never cease. He was of course motivated by the stipulation that he would not receive another allowance until he cleaned it and kept it that way for 7 days. After he finished cleaning, he was in there with the door closed for quite some time, until he asked me to come see what he had made.

He'd unearthed an outdated poster-sized calendar of vintage cars and he didn't want to throw it away. But he also knew I wouldn't want him to tape them all over his walls. So he came up with a trash to treasure idea. He chose 5 favorite calendar pictures, cut them all down in size and laid them out on the floor. Then, he put his clear office mat over the top. 
 The little points on the back side poked right into the paper (those are the dots you see in the pics), which was about as thick as magazine paper. It's held in place without glue or tape and it can be changed out any time. I was so proud and I wished I'd come up with the idea!

Just think of all of the things you could recycle this way besides the calendar pictures. Wrapping paper, fabric, posters...there are all sorts of possibilities! If you have other ideas, feel free to share them in the comments below.

It all starts with an office chair mat like this one from Office Depot:
Add a little of your own creativity, and you've got yourself a terrific office makeover. Thanks Austin for using your creativity and letting me share your idea on my site. You've done your T2T mama proud.


Now, it's your turn to share your ideas. 


Follow Friday Blog Hop
What did you whip up this week? Or what did you find in your basement or at a thrift shop that's just waiting to be redecorated.

Blog Hop Instructions:
  • Be sure to link to a specific blog post not your home page so that we can find your fab projects easier. 
  • Please include a link to the site and mention on your blog post that you're linking up to T2T OR Mention on your twitter account that you're linking up to Trash to Treasure for the blog hop and include a hyperlink to this post. If you tweet a link please mention my twitter name: @trashtotreas in your tweet.
  • You can even get the code and paste the blog hop on your own blog if you'd like these very same ideas posted for your readers.
With the new Linky Tool (formerly called MckLinky) you'll be able to add a thumbnail of your project if you have a picture on your post, or upload a pic from your computer.

WWYD Wednesday

It's WWYD Wednesday already! Congrats to Mallie for the winning idea last week on what to do with an airplane propeller.

I know, I haven't shared any yard sale finds with you yet, but you'll have to remain in suspense for another day or two. I hope you took the time to enter the iPhone giveaway sponsored by Garage Sales Tracker. In the meantime, what would you do with this? 


I saw this old stove at an antique store and wondered what my readers would do with it. I'm not sure the firebrick inside is up to code, so I have my doubts about turning it into a working wood burning stove.

The top part of the stove.

The bottom part of the stove.

My father-in-law has a similar type of old stove that he says I could have if I'd like. However, I'm not sure what I would do with it just yet. I have a spot in my dining room where I could probably make room to have it on display, but it's very heavy. And it's so big, that I'd like to have it serve more of a purpose than just sitting on display. 
So readers, what would you do? How can you turn an old stove from trash to treasure?
Link Up Your Idea
Here's how the WWYD list works.
  1. You leave your idea(s) below on the link list and next week, I'll go back in and edit to name a winning idea.
  2. Add your name at the end of your idea (optional). Example: I would paint it green and add yellow polka-dots. Then add glitter and sequins. From Michelle Rayburn.
  3. Add a link to your blog or a specific post if you'd like us to check out your site or if you want us to see an example of your great idea.

Friday Blog Hop

Bright and early Friday morning, I'm heading over to the Twin Cities for the village of Woodbury's annual city wide garage sales. My teen sons and I will spend two days hunting for treasure. What more could I ask for? It's my Mother's Day treat to spend this time with my boys doing what we love to do.

I'm bringing my camera along and a pocket of cash and I can't wait to find things to feature on future Trash to Treasure posts. Woodbury is about an hour and 45 minutes away, so how does a person go about locating the best sales for treasure?

First I searched the Internet and found out which gas stations will have a directory list of sales for purchase. It lists the sales that are participating in the Lions Club annual sales this weekend. I also discovered a few on Craigslist. But there is a brand new site on the web that had others and if you're into trash to treasure decorating, you might find this tool helpful. Since it's still new, I only found a couple of the hundreds of Woodbury sales listed on the tracker. But that's sure to change as the site grows!

 
Garage Sales Tracker is a site for listing garage sales and it offers you the ability to advertise garage sales on the internet. It also features tools that allow prospective buyers to more easily find garage sales. And the best news? It's FREE.

That means you can search for free and list your sale for free! And now, Garage Sales Tracker is offering an application for your iPhone so you can easily search for a sale in your area. 


Follow Friday Blog Hop
In honor of my bargain hunting excursion today, I'd love to see the bargains you've discovered lately. What trash to treasure finds have you added to your collection?

Blog Hop Instructions:
  • Be sure to link to a specific blog post not your home page so that we can find your fab projects easier. 
  • Please mention somewhere on your blog post OR on your twitter account that you're linking up to Trash to Treasure for the blog hop and include a hyperlink to this post. (If you tweet a link please include my twitter name: @trashtotreas)
  • You can even get the code and paste the blog hop on your own blog if you'd like these very same ideas posted for your readers.
With the new Linky Tool (formerly called MckLinky) you'll be able to add a thumbnail of your project if you have a picture on your post, or upload a pic from your computer.

Propellers- What Would You Do With It?

It's another What Would You Do With This Wednesday. I had a terrible time deciding on a winning idea from last week's WWYD, so this time, I declared them all winners. Great ideas for the rusty tub! I received an e-mail from a reader who thought this was likely a wood ash bin. Another reader said it might be a copper boiler. Thanks for the comments and ideas. 

I snapped a picture of this week's WWYD at a junk/ antique shop. It was out in the yard with lots of other stuff, which you can see from the photo. This shop had several sets of airplane propellers in the yard and I wondered, "What would my readers do with this?"
 So, what would you do with airplane propellers? Could you turn it from trash to decorating treasure? Each set had at least one that was bent or damaged (Side trip: it made me hope that the pilot in each case was okay).
Link Up Your Idea
Here's how the WWYD list works.
  1. You leave your idea(s) below on the link list and next week, I'll go back in and edit to name a winning idea.
  2. Add your name at the end of your idea (optional). Example: I would paint it green and add yellow polka-dots. Then add glitter and sequins. From Michelle Rayburn.
  3. Add a link to your blog or a specific post if you'd like us to check out your site or if you want us to see an example of your great idea.
The purpose of WWYD is to share great ideas, but also to network with other bloggers, so I love those blog links!

Dark Glaze Faux Finish

Recently, I showed you how I faux finished two large cabinets in a white glaze. I got on a glazing roll and did some other furniture. This time, dark wood grain glaze. I have a set of end tables and lamps that we received as a wedding gift in 1989, and I decided it was time to update. Besides, the finish was in rough shape.
I think it looks a lot better on this picture that it did in person. The lamp has a brassy base that has become discolored. Again, making it look outdated.
There are faded and worn spots on top of this table.
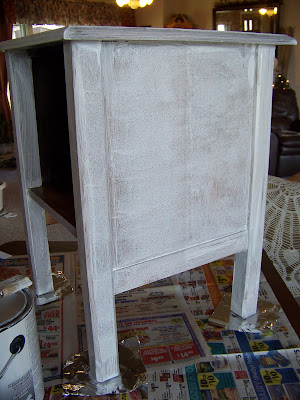
I started off by priming everything in order to make sure the paint and glaze would stick without scraping right back off. I suggest a Zinsser or Kilz type of primer that is made for nonporous surfaces.
After the primer dried well, I coated both pieces (and the lamp base) with a base color. In this case, I chose a pecan colored latex satin paint because I wanted it to have reddish brown cast.
These doors are from another project, but they show what the base color looked like. Once the base coat dried, it was time to mix up the glaze. I used a DutchBoy glaze that had instructions for mixing 4 parts glaze with 1 part latex paint. I used a dark coffee colored satin latex paint for the glaze color. 

Once the glaze was mixed, I painted it on but made sure I worked only in small areas at a time so that it wouldn't begin to dry before I could wipe some off. Yes, I did mean to say wipe some off. Using a damp rag (a cotton cloth diaper type rag), I wiped off some of the glaze after I painted it on. 
If you wipe off too much, you can always add some back on with the brush. 
The wiping must be very light and gentle for this to work. Otherwise, you'll wipe too much off. Also, whenever possible, it's best to wipe with the grain since it will help add some new grain. 

The lighter areas on the finished door are the areas where I wiped off more with the damp rag.
Once the paint dried well, I coated the whole thing in a polyurethane to protect it and to bring out the shine. If you want to get rid of all brush stroke grooves, it's best to let everything dry well, then sand with a very find grain auto grit sand paper and do the poly coat. Then sand lightly again and coat with a Minwax paste finishing wax. This will give it the smoothest possible waterproof finish. While all of this isn't necessary, it does give your pieces a professional looking surface.

Share Your Faves -Friday Blog Hop #12

 Calling all shy bloggers: Will you link for the very first time?
Have you ever posted a link to your blog on another blog? I love following link parties and blog hops to see what other people are doing. 

This week, I'm asking you to post your favorite blog post from your blog. It What trash to treasure idea is a must-see on your blog? It could be something you did this week, or if could be something you did last year. Link up and share your favorite post or the one that received a lot of reader feedback. 

My favorite idea from last week came from The Little Green Bean. She made her own little bolts of fabric and put them on display. Functional and decorative. I could see doing this with the fat quarters I don't know what to do with. And from a trash to treasure perspective, wouldn't this be a great way to display vintage fabrics that you have hidden away?

With the new Linky Tool (formerly called MckLinky) you'll be able to add a thumbnail of your project if you have a picture on your post, or upload a pic from your computer. Don't you love those thumbnails? They're like a little lure drawing my to the wonderful projects.

Blog Hop Instructions:

  • Be sure to link to a specific blog post not your home page so that we can find your fab projects easier. 
  • Please mention somewhere on your blog post OR on your twitter account that you're linking up to Trash to Treasure for the blog hop and include a hyperlink to this post. (If you tweet a link please include my twitter name: @trashtotreas)
  • You can even get the code and paste the blog hop on your own blog if you'd like these very same ideas posted for your readers.

WWYD Wednesday- Rusty Tub

It's another What Would You Do Wednesday and I thought I'd make it a little easier this week. I saw this rusty metal tub on one of my excursions and I'm wondering how you would use it. Would you leave it as is? Change it somehow? What would you do with it?
 Frankly, I'm not even sure what it was in its original day. Anyone know what it might have been used for? Please excuse the poor picture quality. I was in a hurry and the tub was right in the sun!

Update 5/6: For those who wondered about size, it's approximately 18 inches deep and the oval opening on top is approximately 12 by 24 inches. 

Link Up Your Idea

Linky Tools (formerly MckLinky) has made some changes, so I have to get used to the new format. Here's how the WWYD list works.
  1. You leave your idea(s) below on the link list and next week, I'll go back in and edit to name a winning idea.
  2. Add your name at the end of your idea (optional).
  3. Add a link to your blog or a specific post if you'd like us to check out your site or if you want us to see an example of your great idea.
The purpose of WWYD is to share great ideas, but also to network with other bloggers, so I love those blog links!

5/12 Update: I couldn't decide on a winner this week! I liked all of the ideas equally, so I'm going to say you were all winners with great ideas. I love the blog links too! 

I Stumped My Readers!

Ceiling Tile Inspiration
I officially stumped my readers with last week's What Would You Do With This Wednesday. I asked what you would do with old tin ceiling tiles and guess what? No one had an answer to add to the two ideas I gave. So, I thought it would be good to search the web for some other ideas to give you. 

Whether you have old tin tile, rusty tiles, new tiles, or brand new imitation tile made of plastic, you might be inspired to create something of you own. 

The first idea comes from Robojunker.
 Photo from www.robojunker.com
This is a piece of salvage crown molding that has been covered in salvaged ceiling tin. 

Vintage Indie has this sweet memo board featured. I could enjoy that as a magnetic board in my home!
Photo belongs to Vintage Indie
Karen at My Desert Cottage has another take on the same idea in this photo from her blog:

 So, what else can you do with tin? HGTV has lots of ideas.
The roof on this sweet little birdhouse is made from recycled tin by Shannon Quimby. (Photo from HGTV.com) Now, I'm wishing I had bought that old tin I saw at the junk shop! Shannon made these cute little flower pockets...
 And she edged the front of this table...

Junk Sophisticate really did make that junk into something sophisticated. They have a fantastic tutorial for making this beautiful ceiling tile art. I love how it is free-floating.

It looks cool as the backing for a cabinet too. Forever Interiors demonstrates it in this photo from their website.

The tiles make a beautiful wall collage as seen on this photo from Plum Tree Antiques:
If you have the right tools, you can copy this mirror from Cherry Hill Cottage.
 Lastly, Heidi from Birds of a Feather shows how she took a tile and framed it out to make a ceiling medallion for a chandelier. 

Well, I hope you've found some inspiration from these talented crafters. I know my creative wheels started spinning when I started researching. If you come up with an idea, you can still share by commenting below, even though the WWYD post is closed.

LinkWithin

Related Posts with Thumbnails