Content from this blog now appears on www.michellerayburn.com

t

Ideas for Canning Jars & A Friday Blog Hop

Canning Jar Ideas
My readers had some great ideas for ways to use old canning jars on "What Would You Do With This?" this week. I thought I would show some things that I've done with canning jars. You'll probably recognize a theme in my decorations. Yeah, I know. Mostly I make candle holders. That's why I asked you guys for some new ideas!
 
These are three different ways to use canning jars and mayonnaise jars.
  • The one on the left, I purchased at a yard sale. There is a muslin primitive snowman inside and an artificial pine branch. The top is a clear flower pot votive holder. 
  • The middle one was a gift from my sister. She primed the jar with a bonding primer like Zinsser and then used acrylic paints to do the background and snowman. It has a blue flower pot votive holder on top.
  • The one on the right, I made. I purchased the snowman when Christmas ornaments were 75% off. It had a string at the top (since it was an ornament) and I cut that off. Then I hot-glued the snowman to the bottom of the jar and sprinkled some fake snow (the Styrofoam kind) in the bottom. I put a flower pot votive in the top and tied a torn fabric ribbon around it.
I made this candle holder from an old blue canning jar. I used a clear votive holder in the top that flares out a bit (just enough to catch the rim of the jar). I've created it as a memory jar. I put sand in the bottom and then put shells inside that I picked up along the Pacific ocean in northern Washington last year.  The big shell on the outside was too big to fit inside, so I drilled a small hole in it and tied it to the outside with variegated ribbon.
 
This is a lamp that I made from a 2-quart antique blue canning jar. I filled it with spools and sewing notions. To make the fabric balls, I just tore strips of quilting fabric and then wrapped it around small Styrofoam balls, securing the end with a straight pin. The lamp shade was also wrapped with torn strips of quilting fabric. 


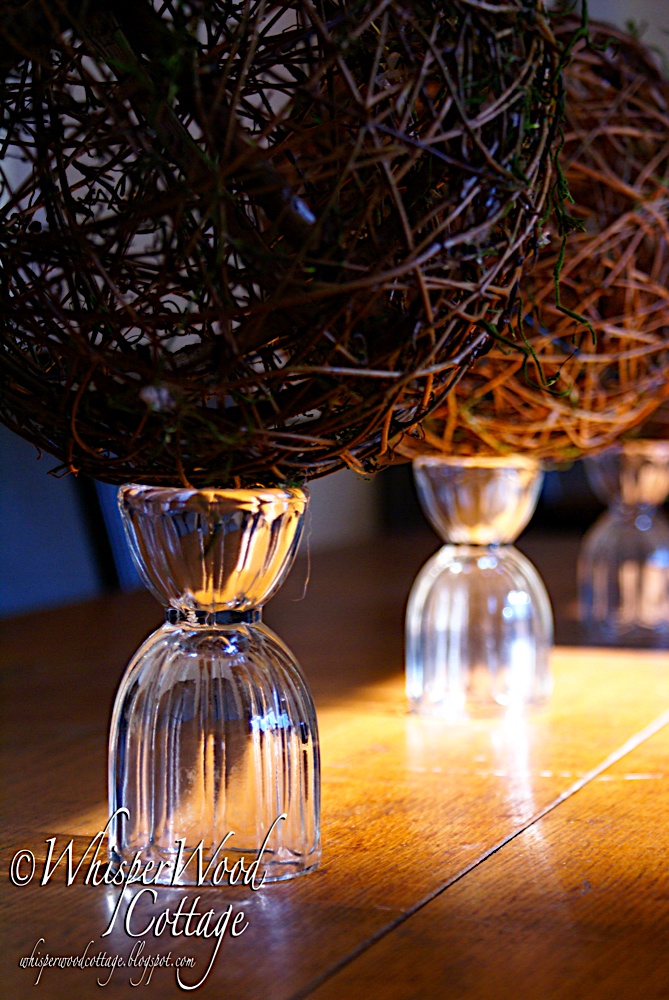
I've created candles from goblets and canning jars (jar not pictured--I gave them all away as gifts). To make the candle on the left from a glass or a jar, insert a small clear glass votive holder inside the jar. Then fill the jar around that inside candle holder with coffee beans. It looks like the cup is filled with beans, but really it's filled around the inside holder. Put a tea light in the holder and when you burn the candle, the coffee beans will give off a light scent.

The jar on the right is for gift giving. I've used small organza bags and filled them with flavored coffee beans to make sachets. They can be given as a gift and the recipient can hang the coffee sachets in the car to smell like a coffee air freshener. 

I hope you were inspired by the jar discussion this week. Now it's time to tell me what else inspired you this week. Tell me what you've featured on your blog by linking up to:
Follow Friday #8
I'm so amazed by all of the great ideas out there! Until this week, I didn't really know what a cloche was, but thanks to the blog hop, I do now. Check out this sweet trash to treasure idea using a candlestick that came from Joan at Anything Goes Here.
 
I can't wait to see what you share this week in the Friday Blog Hop. The creativity out there is so inspiring! Here's how to link up:

Blog Hop guidelines:
1-Add a permalink to your specific post not the home page of your blog. Be sure to check that the link works after you post.

2-Add a short title for your post. This could be your name or blog name if you'd like.

3- Link back to this post from your blog, or send a link to your tweeps on Twitter (mention @trash2treas).

4-Check out the links and leave some comments on the sites you enjoy.

That's all there is to it! I can't wait to see your links and ideas. Never used MckLinky? It's super easy. You don't need an account or any software. Just click on "you are next" below and type a title for the post (or your name) and add a link to the location on the web. It's that simple!


I'm linking up too! I'm linking this post to:
 

What Would You Do With This?

3rd What Would You Do With This Wednesday?
This week, I'm wondering what you would do with a stack of old books. How could you recycle them into decor of some kind? Would you use the pages for a project? Would you stack them or turn them into art projects that make great gifts? Is there a way to incorporate them into furniture?

Tell me your idea in 250 characters or fewer on the MckLinky tool below. And feel free to include a link to an idea that you've already done on your own blog, or just link up to your blog so we can check out your other great ideas. I'll name a WWYD winner next week based on the idea I like best. 

Sorry, I can't afford prizes, but I'm happy to tweet your name and send you some blog traffic!

See last week's post for the results of the 2nd WWYD contest.

Update 3/3/2010: Congratulations to Karyn from CanDarbryGarden for the winning idea this week. I love the idea of making a lamp from the old books! Also, honorable mention goes to Mary from LaughLady.com. I like the idea of using the books under glass on a table, or for picture frames. Thanks for linking up everyone!

Have something you'd really like some ideas for? Send me an e-mail and we'll ask my readers what to do with it. 


Painted Laminate Counter Top

The Tale of An Ugly Kitchen

When I moved into my house, I inherited a pretty ugly lovely kitchen. There were mismatched counter tops on both sides and the older part was stained and warped.It was really blah.
That was easy enough to fix, so I ordered new counter tops and my prince husband installed them for me. I took the doors off the ugly mismatched cabinet and made it my cooking area.
But the room wasn't finished yet. There was this other counter top that was part of a built in china cabinet /peek-through to the dining room. Replacing that counter top was nearly impossible without a heap of trouble. It was this ugly...
...before I plastered and painted the wall. And it was still ugly with the fake wood grain laminate counter top. What was I to do?
 
Here is another view of the problem. 

I decided to look around on the internet to see if others had painted laminate counter tops. And alas.  They had. There were way too many opinions of how to do it though, so I decided to be brave and try it my own way. First, I scratched it all up really good with some sandpaper. Then, I primed it with a primer made for shiny surfaces. I like BIN primer by Zinsser or Bulls-eye by Zinsser, but there are others like Kilz.

That dried really fast. Then I used some regular satin finish latex pain over the top. I used beige to match my walls (See the paneling surrounding the built in hutch? Well, it's beige now.) After this base coat, the fun began.

I scrounged through my craft paints and supplies and worked to match the faux finish to the other counter tops that I had purchased. So I sponged (sea sponge) and toothbrush splattered and dabbed with a dry brush until the surface looked right. I used some brown, some black, some white, and some tan. Then, I coated it with several (at least 4) layers of water based polyurethane letting it dry really good in between each layer.

It isn't a surface that I use for cooking, just for serving and collecting clutter, so it has held up perfectly for at least 2 years now. If I had done this on a high-use area, I'd coat it even more and make sure that I never cut on the surface. 

With this change complete, I lived happily ever after...or at least until the next thing that needed remodeling. Here is a happy ever after picture.
 
 Next time, I'll continue the story and tell you what I did about that awful built-in hutch! It was SO 70's!

I linked up this week to:

Follow Friday Blog Hop #7

 Trash to Treasure Blog Hop
I hope you've enjoyed the new What Would You Do With This? feature. I love your creative ideas. I also love getting ideas from blog hops and link parties. I'm working on prepping for a writers conference where I'll be giving a presentation on blogging for writers. I can't wait to show them how much fun a link party can be.

My favorite post from the last blog hop was the recycled egg cups from Amy at The WhisperWood Cottage. This idea artfully demonstrates finding something at a great bargain and recycling something in a unique way. Way to go, Amy!
 
Now it's your turn. What would you like to share this week? Have you rennovated an interesting piece? Did you find a great thrift store bargain? Figured out a craft project with recycled junk? Inspire us with your ideas. The blog hop will be open until Tuesday.


Trash to Treasure Decorating

Blog Hop guidelines:
1-Add a permalink to your specific post not the home page of your blog. Be sure to check that the link works after you post.

2-Add a short title for your post. This could be your name or blog name if you'd like.

3- Link back to this post from your blog, or send a link to your tweeps on Twitter (mention @trash2treas).

4-Check out the links and leave some comments on the sites you enjoy.

That's all there is to it! I can't wait to see your links and ideas. Never used MckLinky? It's super easy. You don't need an account or any software. Just click on "you are next" below and type a title for the post (or your name) and add a link to the location on the web. It's that simple!


What Would You Do With This?

2nd What Would You Do With This? Wednesday


This week, I'm asking what you would do with leftover canning jars. Sometimes, I have jars with chipped rims, so I can't use them for canning anymore. I've used some for various projects, but I know you have some great decorating ideas out there. What would you do with canning jars or empty clear mayonnaise jars?

I'll share pictures of some of my projects next week. For now, here's your inspiration.
Tell me your idea in 250 characters or fewer on the MckLinky tool below. And feel free to include a link to an idea that you've already done on your own blog. I'll name a WWTD winner next week based on the idea I like best. 

See last week's post for the results of the 1st WWTD contest.

Have something you'd really like some ideas for? Send me an e-mail and we'll ask my readers what to do with it. 

Congrats to this week's winner, Michelle from Happy Hodgepodge Home. I liked her twine idea. It would be cool with stones or mementos inside the twine wrapped jar too. Thank you to everyone for the great ideas below. 

Watch for my canning jar ideas on the Friday, Feb. 26 post.

Recycled License Plate Border

Looking for a fun border for a boy's room or a "man cave"?
My 15-year old son has always been into cars and motorcycles. So, when we were looking for something unique to decorate his room, I had only to look as far as his closet! He likes to collect license plates, and now we have a way of displaying them. He has paneling on the walls (something I know I'll be changing in the distant future) but this can be done on a drywalled wall too.

I attached them all the way around the room just below the ceiling, in the same place you'd put a wallpaper border. I used tiny finishing nails to attach them so that he can swap them out and change them around any time he'd like. Each has two holes in the top that are standard, so it's easy to change them around. He's trying to collect all 50 states, so as he gets new ones, he takes down duplicates.
 (got a little carried away with Picnik on the photo :-) thus, the B&W area)

If you don't want to attach your license plates this way, you could affix something like a plate rail molding (as some craftsman and Victorian homes have) all the way around and then set the license plates in the plate groove. You'd have to check your building supply store for possible molding that would work.

When we came to a corner, we used smaller license plates from motorcycles, but you can easily bend a metal plate in half to hang in a corner. 

Where can you find license plates? We shopped at garage sales, asked relatives to check their garages, and talked with others who collect plates that might have ones to give away. It took around 50 license plates to go around his 11x15 foot room. If you If you don't have enough to go all the way around, consider doing just one wall. 

Wouldn't this be cool in a den, or the office of an auto repair shop too?

Other things to do with license plates.

There are other ideas out there on the web for decorating with recycled license plates. HGTV has some ideas for making a message board, a photo album, and storage binders here

And interior designer Julie Thigpen on her BelleMaison blog shows this mirror on her site:
I know there are many more ideas out there, but I'll save some for another time. I'd love to hear your ideas for how you've used vintage plates.
 

I'm linking up this week to:

The Trendy Treehouse


New Feature- What Would You Do With This?

I'm really excited because I've come up with a new feature for the Trash to Treasure site!

Today is my first What Would You Do With This Wednesday!  
(WWYD Wednesday)
 Here's how it works. I'll post a picture of something on a Wednesday, and then you have a week to tell me what you would do with it to turn it from trash to treasure. Using MckLinky, you'll be able to post your idea and then I'll be able to rank your ideas and announce my top favorite ideas. After a week, I'll close the list and announce a winner. You'll be able to continue to comment on the post, even though the MckLinky list will close.
If it's possible, I'll try your idea and post my results sometime later. And if it fits my budget, once in a while I'll offer a prize for my favorite idea. Otherwise, I'll tweet the name of the winner along with a link to your blog and send you some free traffic.

So are you ready for a challenge? Here's my first What Would You Do picture. A friend of mine has a piano that has been deemed unfixable. Yeah, I know it's sad. So we're wondering, what can we do with it so that we don't have to dump it in a landfill? Is there some way that we can use the wood for something? Maybe make something from the keys or the hammers? I don't know. But I'm hoping you have a great idea!

The piano looks exactly like this one:
Thank you for all of the great ideas! The entries are all below, and our first What Would You Do With This winner is Heather. Keep the ideas coming next week.

From Junk to Art: Cabin Style

My husband works at a Bible camp and when it came time to give the rustic dining hall a facelift, I started hunting yard sales and thrift shops for something to hang on the walls. We painted the worn pressed-wood walls a neutral shade of beige and then the fun began!

I love turning junk into art, so shopping for everything was like a treasure hunt. A lot of the stuff I found right at camp too! The “office” sign was out in the shed in a pile of stuff. So was the green screen. I found the oars and wicker creel at a yard sale for $2. Yes, it’s an antique fishing creel, the kind that can sell for up to $75.100_4592 100_4597100_4598I found an antique popcorn maker (the kind for over a fire) at another yard sale as well as the fruit crate, welcome sign, and paddle. The pictures were old aerial views of the camp that I found in storage and framed.100_4594
I found more old signs in the shed and layered them with old fishing tackle. 100_4603 We had a stack of retro T-shirts that a former camper had donated. Some were from back when the camp opened in the 1970’s. So, I thought it would make a great conversation piece in the hall where people come in to the office. I found a picture frame for a couple dollars at a yard sale that was kind of like a shadow box. I used foam board and carefully pinned the T-shirts onto the board, hiding the pins as much as possible. 100_4600 100_4602I found this wall hanging at a yard sale. It’s a fake fishing pole with frames hanging from it, but this could easily be made from a real fishing pole with picture frames hanging from it. Something I’ll have to try in the future… 100_4596
One of these days, I’ll take pictures of more of the decorations and share. When it comes to decorating cabin style, trash to treasure makes it really easy!

I'm linking up this week to:


2nd Time Around Tuesday at A Picture is Worth 1000 Words


Share Your Ideas, Be Inspired

Friday Blog Hop #6
I must apologize to my readers for not posting a new idea this week! I ended up with a little bug and spent 2 days doing pretty much nothing but napping, so my creative pursuits took a back seat in favor of catching up on other domestic responsibilities. Sigh. If only domestic responsibilities were as much fun as blogging...

Thank you so much for your reader input on my survey this week. I'm encouraged by your responses and I agree, the stuff on the web is overwhelming! I pick and choose which link parties and blog hops to participate in when I have a busy week too. Thanks to your positive encouragement, I'll keep on having those Friday opportunities to link up. And I'll leave them open until Monday or Tuesday for those who have busy weekends. 

 I love this accidental bedroom makeover from The Little Green Bean  that Missy linked up on the blog hop last week. Missy has some fantastic ideas for using old doors and windows, two things I LOVE to use for trash to treasure decorating. Here are a few of her pics.
 
Check it out because she's used at least 2 doors and 2 windows in this room!

Now it's your turn. What would you like to share this week? Have you rennovated an interesting piece? Did you find a great thrift store bargain? Figured out a craft project with recycled junk? Inspire us with your ideas. The blog hop will be open until Tuesday. 


Trash to Treasure Decorating

Blog Hop guidelines:
1-Add a permalink to your specific post not the home page of your blog. Be sure to check that the link works after you post.

2-Add a short title for your post. This could be your name or blog name if you'd like.

3- Link back to this post from your blog, or send a link to your tweeps on Twitter (mention @trash2treas).

4-Check out the links and leave some comments on the sites you enjoy.

That's all there is to it! I can't wait to see your links and ideas. Never used MckLinky? It's super easy. You don't need an account or any software. Just click on "you are next" below and type a title for the post (or your name) and add a link to the location on the web. It's that simple!

Reader Poll: What Would You Do?

Reader Poll
So, I'm looking for reader advice. Your advice. Should I keep hosting a Friday MckLinky Blog Hop with just one or two entries each week, or should I scrap the idea and let people hop and link party on some of the more popular blogs? Are there just too many MckLinky parties out there?

Your opinion matters, so leave your comments below.

LinkWithin

Related Posts with Thumbnails