Content from this blog now appears on www.michellerayburn.com

t

Guest Room Makeover with White Pickle Glazed Furniture

When we moved out of our room and turned our son's former room into a master bedroom, we gained a guest room. I turned our old tiny bedroom into a guest room. When we lived in it, we could barely walk around the queen-sized bed with our two dressers in the room. Now, with a smaller bed I was able to create a pleasing and inviting arrangement.
 The metal bed was a freebie a neighbor was tossing out.
 
I had before and after photos of this dresser. But I seem to have misplaced them. Or deleted them. Oops. I painted them white, glazed with antique brown, and sealed with paste wax.
I hauled my sewing cabinet into the guest room from another room since it matched the other furniture and it's a great place to do a quick mend on something in there.
Proof that even an odd arrangement can work if the furniture is monochromatic.
The chair is part of a set that I purchased at a yard sale. I love white wicker and it's inviting in the guest room as a place to set a tote bag, a place to sit to put on shoes, or a place to read a book.
Just in case you're worried about where we booted my son to in order to gain a guest room...He seldom comes home from college, so he moved to a smaller den we have on the lower level, leaving an extra room on the main level. I haven't had a guest room since giving birth 21 years ago. A strange new phase of life, this empty nesting.

Creative Kitchen Sink Splash Guard

Have you ever considered how to prevent some of the water splashing around the kitchen sink. Outside of just skipping washing dishes, that is. 

When I repainted the kitchen, I had to repair some water damage above the sink, and I hate the puddle that forms when water runs to the side. So I came up with a pretty solution. 
This ceramic plate fits behind the faucet, and within the stainless steel groove of the sink. Now, when I get carried away with the soap and water, it runs back into the sink. It's functional and pretty. There was a rectangle one at the store that I really wanted but it was three times the price. This one will do just fine. Yes, indeed.

Piano Bench Made into Upholstered Footstool

Once upon a time, I bought this piano bench at a yard sale for $1. I quickly stapled some fabric over the existing seat and used it for a while at the piano. But, then I upgraded to a nicer bench and put this one in storage. Until recently. See how lumpy it looks? I fixed that. 
I wanted a footstool for when I sit in my bedroom in the wicker chair, but it had to be very small. Skinny enough to fit between the bed and the chair. So, I chopped about 6 inches off each leg on the bench, took took it apart, and took it outside to give it some spray paint.
 I painted a black base color and sprayed a crackle finish over the top.

Then, using some foam from an old couch cushion (the couch was tossed long ago, but I saved the foam), I added new padding. I also used a scrap of decorator fabric from my stash. Anyone who sews always ends up with a stash of pieces.
After I stapled the fabric around the seat, I drilled two holes in the board and poked a long needle up through, snagged a button, and poked back down through the hole. Disclaimer: it was easier said than done.
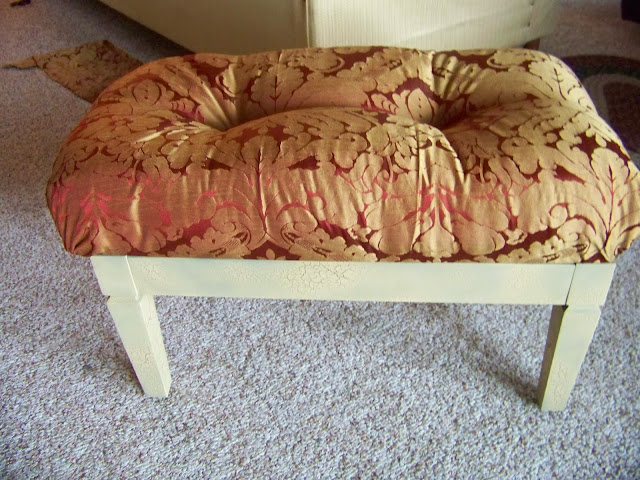
 That gave it this tufted look and ensured that the cushion foam would stay put better.
 The finished product is this little foot bench that has a storage place for books and magazines.
 And here it is with my chair.
 I love projects that cost nothing!

LinkWithin

Related Posts with Thumbnails