Content from this blog now appears on www.michellerayburn.com

t

Shoppers, What Would You Do

Last week on WWYD Wednesday, I asked what you would do with a "practice bomb" that I saw at an antiques store. I liked Sam's idea of leaving it as it was, but I also think it would be fun to make it into something like a floor lamp or a plant stand. Imagine it with a big Boston fern on top, or a funky lamp shade. It's about 4 feet tall, so it has great possibility! Strange, but fun. And wouldn't it be terrific as a lamp in a room with the airplane propellers from a previous WWYD post.

This week, I want you to imagine you're walking through an antiques shop and you see this display. What jumps out at you and what would you do with it?

How to Participate 
  1. You leave your idea(s) below in the comments, and next week I'll name a winning idea.
  2. Add a link to your blog or a specific post if you'd like us to check out your site or if you want us to see an example of your great idea.

Muse Monday

Inspiration for your creative muse from what I see through my lens. One of my back yard trash to treasure yard sale finds.

Follow Friday & Watering Can Feature

On last week's What Would You Do, I promised that I would give you some watering can ideas. So while you're thinking of your favorite post to link up to the Follow Friday blog hop, here's some watering can inspiration. 

We'll start with the more obvious use. I bought this old watering can at a yard sale and planted flowers in it. 


I also picked up this snowman painted watering can at a yard sale. It was already painted, but the paint is flaking a little, so I'll eventually have to repaint.

And then there's this unusual "watering can". It's really an old oil can, but I filled it with flowers and put it on the chair shelf that hangs by my front door. 

I'll wrap up the watering can ideas with short DIY project. First, a little background...When I was younger, I had a cute teddy bear lamp. Do you remember the ones where the lamp went right through the back of the teddy bear? Eventually, the bear got really grubby, but there was nothing wrong with the lamp part. So I did a little surgery and cut the bear off the lamp (I know, you're thankful I didn't take pictures of the poor little bear being extracted from the pole). Here's what I ended up with. 
I stored it away for someday use. I had a watering can planter stored away too and one day, inspiration struck. The opening in the planter was just big enough to fit the base of the lamp. 

Then I rummaged through my craft stash and slipped a mini wreath over the top.

I added a pillar candle ring...

...and topped it off with a simple shade. You could add a much prettier shade if you were creative.

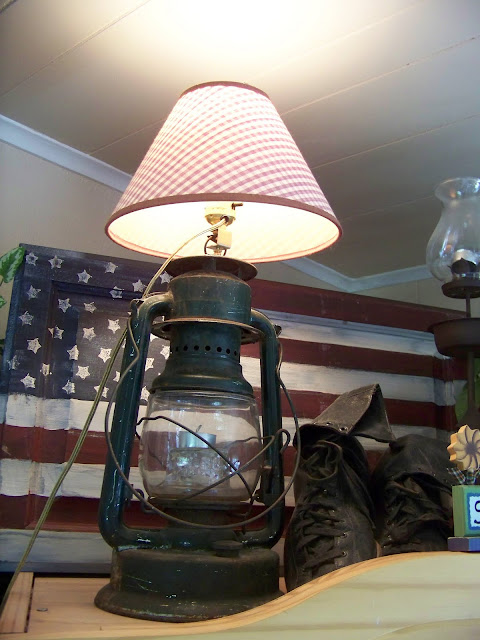
If you don't have a watering can planter, or an old teddy bear lamp you can take apart, you can always make your own watering can lamp in the same way I made my lantern lamp by using a clamp-on lamp kit.

What inspired you this week? We want to know what you're blogging about, so join the Friday Blog Hop and link up your posts below.

Follow Friday Blog Hop

Blog Hop Instructions:
  • Be sure to link to a specific blog post not your home page so that we can find your fab projects and posts easier.
  • Please include a link to the site and mention on your blog post that you're linking up to T2T OR Mention on your twitter account that you're linking up to Trash to Treasure for the blog hop and include a hyperlink to this post. If you tweet a link please mention my twitter name: @trash2treas in your tweet. (note the change in the twitter address from previous weeks. Can you believe I had my OWN address wrong?)
  • You can even get the code and paste the blog hop on your own blog if you'd like these very same ideas posted for your readers.

WWYD Wednesday

This Post is The Bomb
 (see why below)

Trash to Treasure Decorating has been online for 9 months now, and I'm constantly adding elements to the site, making changes and tweaking. One of my desires is for you, my reader, to know what to expect from the site. I try to keep posts as related to trash to treasure as possible. But I also want to inspire your creativity, to motivate you to try something you've never thought of attempting before. You really can DIY! 

I've decided to organize the blog according to daily themes. We already have WWYD Wednesday and Follow Friday, but now I've added three other themes. Now, lest you think I'm going to overload your poor inbox with daily messages, no worries. I know I won't be blogging daily. But, as I come up with projects, tutorials and pictures, I'll post them on themed days. 

New Trash to Treasure Features

Muse Monday—Inspire your creativity
Transformation Tuesday—Before and after projects
WWYD Wednesday—What would you do with this?
Thrifty Thursday—Low cost T2T ideas
Follow Friday—Blog hop for T2T friends

Today, for What Would You Do Wednesday, I have something a little unusual. I saw this at an antique shop and wondered, "What would someone do with that thing?"


Yes, that's right. It's a bomb. Is it even legal to own this? Seriously, I wonder. 

If you saw it in a shop would it catch your attention? Would you have an idea for how to use it? Inside or outside, tell me how you'd use an old bomb for decoration. 

I've decided not to use the Linky Tools for this feature this time since it's been a little temperamental  lately. Just leave your idea in the comments below and feel free to leave a link to your blog.
How to Participate 
  1. You leave your idea(s) below in the comments, and next week I'll name a winning idea.
  2. Add a link to your blog or a specific post if you'd like us to check out your site or if you want us to see an example of your great idea.

Yard Sale Chandelier Makeover

I'm so excited to share my latest project with you because I'm thrilled with how it turned out, and with how little it cost me. When we moved into our house, we had a ceiling fan over our dining table. Our house is old, and that means it's one big trash to treasure project in action.
 This is now the fixture looked when we were moving in 4 years ago. The whole room eventually got a paint and curtain makeover too.

It was quite dated, with an antique brass finish, yellowed fluted glass, and woven cane blades. So I gave it a makeover with new globes, a coat of paint, and fan blades that I picked up at a thrift sale. But I never really liked having it over the table. You know, the wind cooling our hot food, the dust...So, I suggested to my husband that we move it to the living room side of the area where the lighting was always dim due to an absence of a ceiling fixture.

But before I could move the fan, I had to find something to replace the light over the dining table. I solved that problem a few weeks ago while I was at the Woodbury, MN city wide sales. Towards the end of the shopping day on Saturday, sellers were slashing prices and giving away goodies when I spotted a chandelier at a sale. I couldn't find the price tag, so I asked the owner for the price and she said, "It's yours if you want to just take it." I restrained myself from doing any cartwheels right there and hauled my treasure to the van.

I thought the shiny gold was outdated, at least for my taste, but I figured I could solve that with some paint. (My apologies to any readers who LOVE shiny gold). It was heavy duty with good detail on the scrolling, so I knew it was the perfect fit.

To refinish the light, I first removed the plastic parts that looked like candle stems. They just slid off the top and I set them aside.


I coated the whole thing in dark primer, just to be sure I had a good bond. After that, I coated it all in black spray paint. Nothing fancy, just the cheapest I could find. Then, I got creative.

In the past, I've done some faux patina or bronze looking finishes with metallic craft paints. But this time, I hunted through my stash of spray paints and found some copper and one that looked like platinum. Both were metallic finishes. I used those to airbrush some highlights onto the black finish.


I kept spritzing with the spray paint until I was satisfied with the finish. Actually, the word "satisfied" doesn't describe it well. I was ecstatic!

The metallic paint reflects light, which is why it looks silver in the picture above and darker in the one below.
Close-up of the platinum/coppery finish.


Once it all dried, my hubby hooked it up to the wiring over my table and secured it to the ceiling. I just love the transformation. And since I already owned all but one can of paint, and one electrical junction box, the whole project cost under $5. My hubby had the wiring on hand left over from other projects to wire in the fan.

Now that's a transformation I can live with!

As you can see, the entire dining area has undergone some transforming over the past 4 years. Below, you can see how the fan fits in its new location over the seating area.

 
I guess the glow from all those lights makes it a little difficult to see the finish of the fan.

I'm glad it was a rainy day and my hubby had some time to do an indoor project! And I'm so glad we were able to do it with almost no cost. Another point on the yard sale treasure scoreboard.

I'm linking up this week to these fabulous blogs:
The Girl Creative
 Just Something I Whipped Up at DillyDally And Flitter

Get Your Craft On at Today's Creative Blog
 Metamorphosis Monday at Between Naps on the Porch
 Anti-Procrastination Tuesday on New Nostalgia  
 Transform Tuesday at the Pumpkin Patch


  Letting the Creative Juices Flow Linky Party
The Project Parade at the DIY Showoff
Trash to Treasure Tuesday at Reinvented

What Would You Do with a Watering Can?

For today's What Would You Do Wednesday, I'm asking, "What would you do with an old watering can?" I saw this one at an antique store, but I didn't buy it because I already own several. Next week, I'll show you what I've done with mine (both indoor and outdoor projects), but this week, I can't wait to hear your creative ideas on WWYD.

Photo by Trash to Treasure Decorating

It's summer and everyone is busy, so I'm not surprised that we didn't have any ideas posted last week for toilet paper crafts. This week, I decided to choose something more summery, so my readers can implement the ideas right away.  it's the season of watering cans and gardens.

 What Would You Do With This?

Here's how to participate:

  1. You leave your idea(s) below on the link list and next week, I'll go back in and edit to name a winning idea.
  2. Add your name at the end of your idea (optional). Example: I would paint it green and add yellow polka-dots. Then add glitter and sequins. From Michelle Rayburn.
  3. Add a link to your blog or a specific post if you'd like us to check out your site or if you want us to see an example of your great idea.

Flag Day is Next Week

Over the weekend, I featured two flags that my son is auctioning for his missions trip. Since flag day is coming on Monday, I thought I would search the web for other ideas for displaying the flag in non-traditional ways, trash to treasure style. Plus, I'll feature a few of my own that I've made.

First, I found this picture of a flag painted on an old window.


Then I found a flag on Home and Garden TV that was made from old bats and balls.

 Photo from HGTV

I made the flag in the next picture myself from a cupboard door that I bought at a thrift shop for $1. I primed it and then painted on the stripes. 
Photo property of Trash to Treasure Decorating


And I made this one by sewing a quilt to fit behind and old window.
 Photo property of Trash to Treasure Decorating

This one, I made using a flag pillow sham. No sewing involved, I just stapled it on the back.
  Photo property of Trash to Treasure Decorating

This flag is painted on wavy tin. I'd love to make one like it someday!

However you display it, I love the American flag! I hope you put yours out this week. 
One more thing, in my search, I found this Pottery Barn flag for $129. I have to admit, I like the rustic look of the one my son made and by using recycled wood, his is nowhere near $129. That's the beaut of Trash to Treasure!
Image from Pottery Barn

Flag by Dallas Rayburn (see blog post)

Flag Auction for Missions Trip

My son who has just finished his junior year in high school is going to Bolivia on a missions trip this summer. He's raising funds for the trip, but he also has a few other expenses for which he is responsible. When he found out how much a passport was going to cost him, he decided he would like to make a couple of items in his shop classes to sell to raise money towards the passport. 

He scrounged around our stack of wood scraps and came up with these flag designs. I love the trash to treasure concept in taking pieces that might have ended up on the kindling pile and turning them into something both patriotic and decorative. I guess he's caught the artsy bug too!

I love the "tattered" ends! Makes me think of a battle flag that still proudly waves.

I offered to "auction" the pieces off on my Trash to Treasure blog for him as a means to raise his funds for his passport. I've decided to host a silent auction where bidders send their bid via e-mail to me and the artwork will go to the highest bidder. After the auction close, I'll notify the winning bidder and then send a Paypal invoice for the winning bid amount plus postage. Just like an E-bay auction, payments will be handled securely by Paypal and then I'll ship the item(s). See the details below.

 This is the small flag. It is crafted of weathered wood and pieces of lathe strips. The back is covered in thin plywood painted black and it comes with 2 sawtooth hangers attached. The small flag measures 19.5 inches wide by 12 inches tall. It is painted with a wash of red, white and blue and sprayed with a coat of clear Krylon for protection. This items weighs 2 lbs, 8 oz.

The colors are very muted, as though weathered which means the blue is more of a faded blue-gray. The red is a faded, pinkish red. They can be hung outdoors or indoors.

The large flag is painted in the same colors and constructed of the same weathered wood and lathe strips. The back is made of a thin plywood painted black and this also includes two sawtooth hangers on the back. The large flag measures 37.5 inches wide by 25 inches tall. It weighs 10 lbs.

You can see from the top picture how they compare in size to one another.
 Photo of back side of small flag (large flag in background)

Flag Auction Guidelines

Bidding opens on Thursday, June 3 at 6:30 pm Central Time and closes on Thursday, June 10 at 6:30 pm.

There are 2 flags up for silent auction. One large flag and one small.

My son has established a reasonable minimum price for accepted bids and we reserve the right to close the auction without naming a winning bidder if this reserve price is not met in the bids we receive. If this happens, I will announce it on the blog and re-open the auction for consideration of higher bids.

Bids should be sent via e-mail to Michelle Rayburn (click link here) with Flag Auction Bid in the subject line. Please specify whether it is for the large flag, the small flag, or the pair of flags. Include your name and e-mail address in your bid.

I will ship to the 48 states only. I'm sorry, it's just too costly to ship elsewhere. Buyer will be responsible for the following S & H cost which has been calculated using online UPS postage calculators:
  • Cost for large flag is $17 (UPS Ground)
  • The small is $11 (Priority Mail)
  • Combined is $20 (UPS Ground)

  • If you are local to New Auburn, WI, you have the option of picking up the item.
For your sense of security, I have a 100% positive rating on E-Bay. Check out my rating for a reference here.

The winning bidder (if you bid on the pair) or bidders (if highest bids are separate items) will receive an e-mail from me with an invoice linking to Paypal where you can complete your payment.

If you have any questions, feel free to send an e-mail to me (Michelle). Thanks for taking the time to look at my son's artwork today!


Michelle


Toilet Paper- What Would You Do?

I have 46 minutes left in Wednesday, so I'd better get this blog post up on the double. Those Monday holidays sort of confuse my weeks. It feels like Tuesday today!

On today's WWYD, I'm featuring toilet paper. What clever project have you made that used toilet paper? Or what cute ideas have you seen? Use the whole roll, use parts of it, or use it as a paper mache...any way you use toilet paper to make some sort of decor.

And don't forget the cardboard tube. I know some of you have some very creative decorating project that recycle the tube.

Remember my fall pumpkin made from a roll of toilet paper? Get the full tutorial here. 

I found this classy cast paper project on Art from the Attic. Wouldn't this magnolia be terrific matted and framed?
Photo by Art from the Attic

These days, a roll of TP isn't much more than 50 cents, so it makes the perfect budget-friendly project ingredient. 

Ready to share your idea with us?

Here's how:
  1. You leave your idea(s) below on the link list and next week, I'll go back in and edit to name a winning idea.
  2. Add your name at the end of your idea (optional). Example: I would paint it green and add yellow polka-dots. Then add glitter and sequins. From Michelle Rayburn.
  3. Add a link to your blog or a specific post if you'd like us to check out your site or if you want us to see an example of your great idea.

LinkWithin

Related Posts with Thumbnails