Content from this blog now appears on www.michellerayburn.com

t

Showing posts with label Furniture. Show all posts

More Furniture Transformation

I promised I'd show you more of my furniture makeover, so for Transformation Tuesday today, I'm featuring the chair-and-a-half reupholstering re-do.

When I ordered my chair, I was really into country plaid. But several years later, I wasn't so in love with it anymore. Here's what it looked like, and let this be a lesson to you when you order furniture. Choose something NEUTRAL and let the pillows be the pop.

Now, I must issue a little disclaimer here, as I didn't exactly go neutral when I chose the new fabric. However, it was cheap and it matched my color scheme and I can't pass up a bargain.


The only sewing involved was on the chair cushion. I used the zipper from the old cushion and took apart the fabric pieces to use as a pattern for the new one. I also sewed what was basically a big pillow case for the backrest part. The rest of the project was stapling.

There are some secrets to upholstering that make it so much easier than most people think. It's important to have strips of medium weight cardboard on hand. I know they make tack strips specifically for upholstery, but I make my own by cutting mat board into strips. What is this for,  you ask?

Check out this edge:
It's on the back of the chair and the side where the puffy part meets the flat part. The rough edges of the puffy arm part is stapled down behind this straight edge. When I'm working on the straight edge, I flip the fabric up, leaving an inch behind my cardboard strip, and then I staple the strip to the chair. Believe it or not, there is a wood framework under most chairs. 

Once the strip is secure, I can flip the fabric back down and I have a nice neat, tight edge. Then I staple the bottom edge of the fabric under the bottom side of the chair. 

On edges that show, I use upholstery tacks where I can't do the flip and staple technique.

Here is a helpful video from www.diyupholsterysupply.com on how to do the back of a chair.You'll see what I mean by flipping the fabric the other way and using tack strips.
And here is another video that shows a chair from start to finish. This one comes from www.undercoverbydesign.com.
I'm a little lazy I guess, because I don't always remove all of the old fabric. Often, I go right over it when I can. If the chair is too old or the cushion has an odor issue, then I consider a bigger transformation. Otherwise, I look for ways I can fold and staple to avoid sewing.

Looking for a good place to start? Try dining chairs or a footstool and see how it goes. Then move on to something a little bigger. You'll be amazed by how reasonable it is to remake furniture instead of throwing it out and buying new.

Transformation Tuesday

In 1992, I was pregnant with our first baby, and I decided it was time to upgrade from the castoff couch that we had inherited from my parents. So, we purchased a sleeper sofa in the ever-so-popular country blue color. Later, I wished I had chosen something more neutral since we ended up keeping the sofa much longer than I had anticipated. Two summers ago, when it was 16 years old, I decided to reupholster it rather than replace it, since we had two teenage boys and I didn't want to purchase a new one just to have it covered in pizza sauce and spilled soda. If you live in an all boy kingdom like I do, you'll know my distress.

So I was faced with the dilemma of figuring out how to bring the old sofa into a new millennium on the cheap. The old blue recliner lives in the family room now, thank goodness.


When my hubby and sons were off on a fishing trip, I headed to the nearest Mill's End Textile store for fabric. I ended up finding it for just $3 per yard and since it took about 10 yards to do, the whole couch at $30 was less than I'd spend on one of those bunchy looking pre-made furniture covers. 

I sewed and stapled and tugged until the sofa looked like this:
That makeover prompted others, of course. Who ever starts a makeover project without it turning into a much bigger one? I'll share other phases of the makeover in future posts. 

How about you? Do you have a piece of furniture that you just have to stick with for some reason, but you really hate it? Reupholstering is much easier than you think.

Mary Kay Hutch Makeover

Today's Transformation Tuesday makeover comes from a reader who is in a different type of makeover business; she does beauty makeovers. Shauna is a regular reader of the Trash to Treasure blog, and she sent me a link to photos of her project. She needed some sort of cabinet just for her Mary Kay business supplies, so she set out for her local thrift store hoping and praying she would find just the right thing.

Wouldn't you know it, she did find just the right thing and right in her price range. Of course it needed some trash to treasure TLC, but she knew that was no obstacle when the price was perfect at just $20.

Shauna's hutch started out like this.
I think the wear on the drawer was just a little more trash than treasure for Shauna's taste. So she got to work. She sanded and prepped...

This is how it looked after her husband helped her sand it a little.


Of course, she chose a color that would set off her business supplies perfectly. Mary Kay is all about pink, so why not paint the cabinet pink?

After all that work, it turned out really cute.

I think the black trim really adds something. Shuana splurged a little on the new hardware, but in my opinion, it's worth it.


All said, this project was under $50 with the paint, hutch, and hardware. Thanks for sharing your great project Shauna. We love it!

For all of my readers, if you have T2T projects and don't have your own blog or website, I'd love to feature your project for you. Just drop me an e-mail and tell me what trash to treasure transformation project has you just itching to share it with someone.

Dark Glaze Faux Finish

Recently, I showed you how I faux finished two large cabinets in a white glaze. I got on a glazing roll and did some other furniture. This time, dark wood grain glaze. I have a set of end tables and lamps that we received as a wedding gift in 1989, and I decided it was time to update. Besides, the finish was in rough shape.
I think it looks a lot better on this picture that it did in person. The lamp has a brassy base that has become discolored. Again, making it look outdated.
There are faded and worn spots on top of this table.
I started off by priming everything in order to make sure the paint and glaze would stick without scraping right back off. I suggest a Zinsser or Kilz type of primer that is made for nonporous surfaces.
After the primer dried well, I coated both pieces (and the lamp base) with a base color. In this case, I chose a pecan colored latex satin paint because I wanted it to have reddish brown cast.
These doors are from another project, but they show what the base color looked like. Once the base coat dried, it was time to mix up the glaze. I used a DutchBoy glaze that had instructions for mixing 4 parts glaze with 1 part latex paint. I used a dark coffee colored satin latex paint for the glaze color. 

Once the glaze was mixed, I painted it on but made sure I worked only in small areas at a time so that it wouldn't begin to dry before I could wipe some off. Yes, I did mean to say wipe some off. Using a damp rag (a cotton cloth diaper type rag), I wiped off some of the glaze after I painted it on. 
If you wipe off too much, you can always add some back on with the brush. 
The wiping must be very light and gentle for this to work. Otherwise, you'll wipe too much off. Also, whenever possible, it's best to wipe with the grain since it will help add some new grain. 

The lighter areas on the finished door are the areas where I wiped off more with the damp rag.
Once the paint dried well, I coated the whole thing in a polyurethane to protect it and to bring out the shine. If you want to get rid of all brush stroke grooves, it's best to let everything dry well, then sand with a very find grain auto grit sand paper and do the poly coat. Then sand lightly again and coat with a Minwax paste finishing wax. This will give it the smoothest possible waterproof finish. While all of this isn't necessary, it does give your pieces a professional looking surface.

Finishing Touches For Cabinet Makeover

When I finished the cabinet makeover, I decided that I needed to add a few more touches. After all, if the men who live in my home thought it was primed rather than glazed to perfection, guests might think the same. Although, I'm sure most of my guests will have more imagination than my sons. Anyway, I decided to make the cabinets match my faux fireplace. 
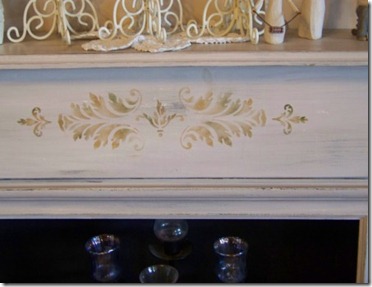
So, I got out the stencils and stenciled the same design on the doors. There are 2 pieces to the stencil which gave flexibility to make it fit right. 
But that wasn't quite enough. I didn't want to put the old wooden knobs back on. Remember these?
So I headed for the home improvement store on a mission to find something the brought these cabinets into this decade. I chose a ring pull for the large cabinet. 
I chose smaller but similarly finished knobs for the smaller cabinet.
I did not drill these holes. They came uneven from the factory, can you believe it?
That wraps up this part of the makeover. Stay tuned for the makeover of those lamps and end tables from the WWYD feature

I've linked this post to:
Antiprocrastination Tuesday at New Nostalgia
 Transformation Tuesday at The Pumpkin Patch
Letting the Creative Juice Flow Linky Party at These Creative Juices


Faux Finished in Whitewash

In one of my earlier What Would You Do? features, I posted pictures of some of my dated 80's and 90's furniture that I would like to update.  You gave me your terrific ideas and I took them all into consideration. It's time to unveil the changes! In this first post, I'll show you what I did with the two cabinets. They started out looking like this: 
I thought the golden pine finish was a little bit dated, and I thought the pieces might be a little heavy for the room. I thought about making them dark like my TV cabinet, but then decided a lighter color would be better. The smaller cabinet holds my music for piano students and the larger one holds my sewing supplies, but since they stand right by where people come in and out of my home, I didn't want them to be so prominent. So, I decided on the whitewashed finish that I have on my faux fireplace (see the fireplace feature here). 

The point of no return...cabinet doors ready for priming.
 

First, I primed both cabinets in white. A primer like BIN primer by Zinsser or Bulls-eye by Zinsser, or Kilz works best on shiny or non-porous surfaces. The primer dried quickly. 

Then, I base-coated the cabinets. Since I was planning to do a glaze finish, I chose a pecan color (kind of orangy brown). A dark gold would work well, or a cherry color, depending on the look you're going for. My base color is the middle one on the swatch.
 
I chose a good interior paint with a lifetime warranty. I used a satin finish because the glaze can said this would work better than flat.
 

The instructions on the glaze can say to let it dry 24 hours before glazing. I'm way to impatient for that, but I know you'd follow the directions. So please, follow the rules. After it has dried for *cough* 24 hours, you're ready to glaze.

I used a Dutchboy glaze that comes in a gallon pail and you mix it with latex paints to tint it. It's supposed to be mixed one part paint and 4 parts glaze. I eyeballed these amounts, but you can measure if you like precision.

To make my cabinets look whitewashed, I used white paint in my glaze. Now, you're probably wondering what I went and painted that darker color on for if I was planning to just paint them white. Well, that's a good question. When I did my fireplace finish, I painted a darker color, painted white over and then sanded off some edges to make it appear aged. With this cabinet, I didn't want to sand for fear I'd end up with the yellow pine showing through. The glaze gives me the freedom to wipe off some glaze here and there while it is wet to get that aged look. The darker color underneath gives me some color depth when I play with the glaze.
Because I'm artsy and I like blending and shading, I mixed up three glazes. The largest one was white. Then I mixed a little with the background color and a darker brown so I could streak on other colors. 
Working in patches that wouldn't dry too quickly, I painted on the white glaze, allowing it to be a little streaky. Then I used a damp cotton rag to gently, very gently, remove a little of the glaze on some of the edges and in a few other places. Then I dipped just the corner of my brush into a brown or pecan colored glaze and touched it here and there, blending it well. 
I'm guessing it's taboo in the glazing world to go back over areas that have already been coated, but I kept blending and streaking all over the place. I did the cabinet sides the same way.
 Here is the finished glaze. 
My boys, who have little decorating imagination, came home from school and asked why I had left the cabinets primed. Whatever. In my next post, I'll show you how I updated the knobs and added a little more pizazz to both cabinets to finish the project.
This post linked up to:


Motivate Me Monday at Keeping it Simple
Keeping It Simple
2nd Time Around Tuesday at A Picture is Word 1000 Words
Get Your Craft On Tuesday at Today's Creative Blog
DIY Day at A Soft Place To Land


DIY Day @ ASPTL


Stop by these sites for more fantastic Trash to Treasure ideas!

LinkWithin

Related Posts with Thumbnails