Decoupage was around in the 70's when I was a kid. I remember my mom and my aunts decoupaging napkins on plaques and wedding invitations on candles. Wrapping paper, greeting cards, pages from a magazine...you name it, they decoupaged it.
Then, we didn't hear about it as much for a long time. It's back, but I think it's often overlooked as a decorator's solution to a quick makeover. With all of the fabulous scrapbook papers out there, there is a plethora of options for anyone who wants to transform an object. I recently completed this project for a gift.
Joann Fabrics and Crafts has paper cardboard letters that can be used for a lot of things. I made one as a monogram for my friend's last name, but you could spell out a child's name to set on a shelf or hang on a wall. Since these are cardboard, they are light weight. For Transformation Tuesday, I'd like to give you some ideas for how you could transform something.
It stands nearly 12 inches tall.
I traced the shape of the letter on the back side of scrapbook papers and then cut coordinating strips that would wrap around the edges.
I added a couple of extra cut-outs from the paper because they didn't fall in quite the right spot when I cut out the letter. Adding a few extra flowers on the front added interest.
After the decoupage glue dried, I sanded the edges a little bit just to add interest. I like the shabby look of sanded edges.
Think of all of the things you can decoupage! That cardboard box that would make a perfect jewelry box. Or the Oatmeal canister you want to make into a storage container. Or the lamp shade that needs an update...the possibilities are limitless.
What will you transform?


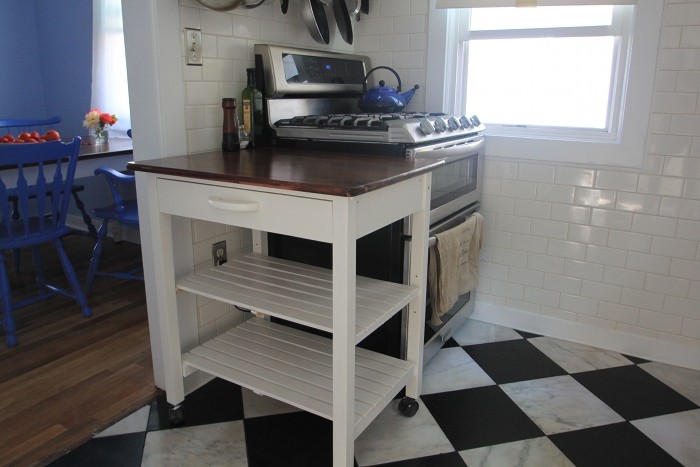 Isn't that cool? Here's what Linn says they did:
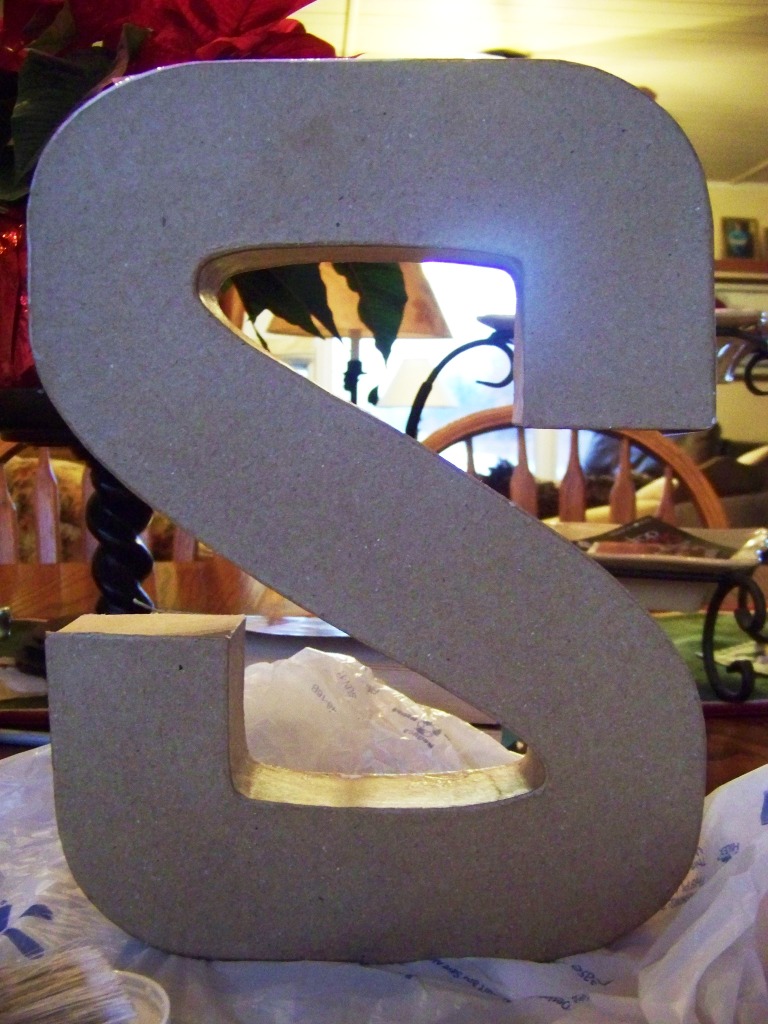


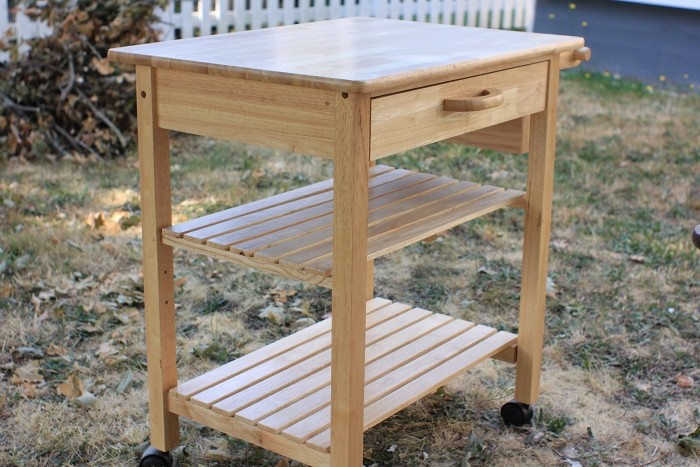
 I was browsing on Craigslist and came across this little cabinet and I wondered what someone would do with it. Unfortunately, I can't make the photos any larger, but I think you can get an idea of what it looks like.
  The description says it has double sliding doors and that it has some scratches. I'm not really sure what its intended purpose was. Maybe it was for a TV?


