Content from this blog now appears on www.michellerayburn.com

t

Having a Safe and Happy Holiday Season

As we prepare for the holidays, I thought it would be appropriate to address the concept of family safety. Today, I'd like to feature a guest blog post that will get you thinking about safety as you bring out your favorite decorations and put up the tree.

Having a Safe and Happy Holiday Season

The purpose of the home is to provide a place of comfort and stability for a family to enjoy and rely upon. This purpose is exemplified and enhanced during the holiday season, as Christmas lights go up and decorations take over. Most would agree that there is little more comforting or satisfying than coming home to a house lit up with Christmas lights, with a wreath on the door and perhaps a fire crackling in the fireplace. 

While the joys of the holiday vibe can be somewhat seductive, it is also important to remember that for your home to obtain and maintain this level of comfort, it requires an adequate home security system. After all, there is no sense in decorating your home to display comfort and welcoming if the home itself is not completely safe. So, here are a few tips for home security during the holidays.
  • Going into the holiday season you should double check to make sure that your security system includes working smoke alarms. With lights strung up all over the place, constant cooking, and likely fires in your fireplace, your risk of a house fire undoubtedly increases during the holidays. So, while it may seem a bit paranoid to consider this to be a substantial risk, you will want to make sure that you have working smoke alarms. This can allow you to relax and know that even in the event of an unexpected fire, you and your family will remain safe.
  • If you place heavy focus on decorating the exterior of your home and your yard, you may be tempted to remove anything that clashes from the front of your house – such as a sign that might advertise that you are protected by ADT Security. However, it is important not to sacrifice your safety in the name of aesthetics. Make sure that protective signs and window decals remain clearly visible through your decorations, as these are important elements of home security that can deter crime.
  • Do not be tempted to set your alarm less frequently during the holidays. Particularly for people who have guests coming in and out of the house during the day and night, it can be tempting to slack off on setting the alarm. However, despite how annoying it might be to deal with managing the alarm while your guests come and go, it is once again important not to sacrifice security for comfort. In the greater scheme of things, the slight annoyance is well worth the potential benefit. 
Guest post brought to you by homesecurityfamily.com. Article printed with permission. This content may not be redistributed without permission.

Transformation Tuesday- Crochet T Shirt Rug

What do you do with a pile of T-shirts that have a rip or a stain but are otherwise in good shape? Make a rug! At least that's what Shawna at A Very Dandoislion Life did. She shows how to cut the T-shirts into strips and make T-shirt yarn. Then she crocheted them into rugs. I love the colors.
Photo belongs to A Very Dandoislion Life
Check out the full post at A Very Dandoislion Life for the tutorial. Shawna bought T-shirts at the thrift store, but I could see cleaning out my boys' closets and getting rid of ones that are small or have holes. Thanks for the great idea Shawna!

Dry Erase/ Chalkboard Vintage Window Message Center

I just finished a customer order for one of my vintage windows, so I thought I'd share with my readers. The top of the window is glass backed with paper decoupaged on. The glass works as a dry erase board. And the bottom is chalkboard paint (applied to the front). A handy little messaging center.

I know it's a little hard to see the color in the second one. A little too much sunlight in the living room when I took the shots. The little calico pouch is the eraser. I sew a pocket and filled it with batting.


Friend Friday - 11/11/11

I thought it would be appropriate to mention on Friend Friday that one of my blogging friends has featured my blog this week. 


She's got a fantastic blog hop happening over there, so hop on over and link up to Suzy's site!

Thanks Suzy! That was fun.


My Latest Art- Transformation...uh..Thursday.

Um, it's a little late for Transformation Tuesday. But if you don't mind, I'd like to squeak a Transformation Thursday in here (it will be almost Friday by the time I get it posted, but who's counting?)

Here's what I did with some of my stash of vintage windows. I love how they turned out! Between these and the ones I made last year, I had a nice little stash last weekend to take with me to a local craft show. I sold half of my inventory. Yay!

I started with plain window sashes. Some were really weathered, others weren't so much. So when they were all done, if they were too white and clean, I used a little tan glaze to make them look more aged.
I planned to use chalkboard paint and the can said it could be used on glass. But I was a little skeptical, so the first window, I primed with 123 Primer. But then, I noticed when I was putting on the chalkboard layer of paint, the primer was coming off, so the next windows I decided to just put the chalkboard pain straight on.
The French door was very old and it was peeling a lot, so I gave it a coat of poly to seal the paint just as it is.

After the WWYD Wednedsay challenge last week, I took your advice and left the top as it was after I had decoupaged paper to the back of the glass. I didn't add anything to the front.
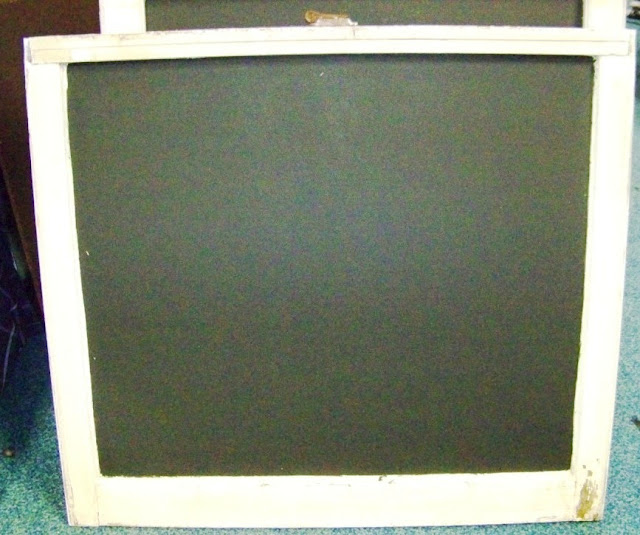
I decoupaged paper to the backs of the top part of the window sash and painted chalkboard paint on the bottom. I tried different method for paint application. I found that a soft nylon brush worked just as well as a little foam roller.
 
 
 I decided to do some with chalkboard on both top and bottom.
 And some were solid glass, so I did the whole thing in chalkboard paint.
 Some were skinny little windows. Notice the cotton pouch hanging there? I sewed little pockets from cotton fabric and stuffed them with batting for erasers.
 The big French door is my favorite!
The paint can suggest conditioning the painted chalkboard surface by rubbing the side of the chalk over the whole thing and then erasing it. The surface can be washed too.

I used Rust-Oleum brand chalkboard paint in Black Flat. Chalkboard Paint can be used to create a usable chalkboard surface on metal, wood, masonry, drywall, plaster, glass, concrete, unglazed ceramic and hardboard surfaces that can be written upon and erased cleanly. This latex-base paint is easy to clean and is formulated to withstand the rigors of daily use.


What Would You Do Wednesday - Vintage Window

I'm working on these windows and I have a question for my readers. First, let me tell you what I've done so far. I painted chalkboard paint in the "bottom" panes of this very old French door and I've decoupaged decorator paper on the backside of the upper windows. I'm using the door sideways, so I've left the original hinges on the side to use as hangers for the artwork.

Now here's my debate.

Should I add numbers 1-5 in the upper panes with vinyl lettering as an accent? Or should I leave them as is? The glass in the top can be written on with dry erase marker, but since I have chalkboard on the bottom, I'm not sure it's necessary to worry about writing on them. 

So, what would you do? Blank or numbers.

Transformation Tuesday - Sneak Peak

I SO wanted to be able to show you my finished transformation today, but alas, paint can't be hurried. Ok. I had some other delays too. But, while I watch my chalkboard paint dry, here's a sneak peak at the before and after transformation I'm working on.


LinkWithin

Related Posts with Thumbnails